Sunday, May 19, 2013

DIY Wedding Decor: Sola Wood Flower Pomander Balls


{Update: we are thrilled to be featured on the WeddingBee boards!}

Flowers are expensive. Ok, now I'll tell you something you don't know. Sola wood flowers are not expensive.

I'll tell you a few other things I've learned recently:  Sola wood flowers are actually made of wood from tapioca plants. It's like a really thin version of balsa wood - made into FLOWERS! And they look incredibly realistic.

My discovery path looked a little like this: Pinterest > Etsy > Google > Saveoncrafts.com > Pinterest > theknot.com.

Here's a little tutorial on how to make your own sola flower pomanders! They, and these instructions, could be used to make so many different decor items. I can't wait to search out and DIY some other creative ideas for them!

1.    I purchased hundreds of sola wood flowers from saveoncrafts.com. Most of them were the natural wood color, except for a few that I ordered already dyed orange. {our colors are a peachy orange, gray, and lots of white and blush pink} They cost approximately $.25 each.


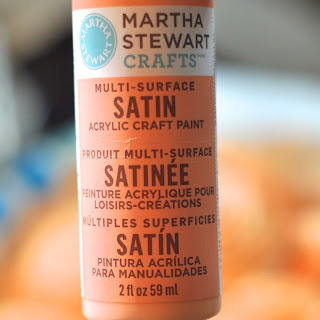
2.     There weren't many color options available, so I decided to make my own. I bought a couple of craft paints from Michael's Crafts.


3.     And mixed them into some water in old tupperware dishes. When I first tried, I underestimated the amount of paint I'd need. I kept mixing until it coated the flowers nicely when I dipped them in. I'd say I used about half of each bottle with the amount of water you see below. 


4.      I just held onto them from the bottoms, dipped them in, swished {technical term} them around a bit, and plopped them on some paper towel to dry. I didn't soak them in the paint at all - in fact, I never let go of them, the whole process for each flower took approximately 3.786 seconds.


5.     Aren't they pretty?!?!?!  I'm in love.
6.     Then I pulled out this styrofoam ball. One of the twelve I purchased. We'll talk later about why I'm returning 11 of them...


7.      And I also bought this fun little gadget - a glue stick melter. It's like fondue, for crafters! It's better in theory than in practice, though. When I make the rest of these poms, I'll go back to my trusty glue gun...


8.     Back to the poms. I dipped the ends of the ribbon in the melty glue, and set them on the styro ball. I'd estimate I used about 20 inches of ribbon. Then I tacked it in with some stick pins, just to triple-secure that they won't fall apart if it gets windy on wedding day!! 


9.      Then I started gluing! I used the natural colored, the purchased orange, and my new DIY-dyed flowers in a random pattern. 


10.  Ta Da!!  I'm completely, ridiculously in love with how well this turned out! And how real the flowers look. So much better than silk or other fake blooms....


{oh yeah, and about the styro balls I mentioned returning - it's because they were so large, they took over 60 flowers each to make, and were about 3 inches bigger than I expected. you know, because the flowers add circumference once you add them....clearly I didn't anticipate that. so I'm buying less expensive, smaller ones that will require fewer flowers, meaning this project will cost EVEN LESS!!}

How would you use these fun, wood flowers? In a bouquet? Just like this? What colors would you dye them? 

homework     

Thursday, May 16, 2013

May Sale, 2013

Whoop! Our May sale is just one day away! {and we have so much yet to do, but that's another story...}

Address:  300 Broadway Street, Carver, MN 55315

Here are some fun photos of what you'll find at the store this month. And much, much, more....consider this a little visual teaser. Stop in, say hi, and check out all the fun new {old} junk!


Wednesday, May 8, 2013

A Mid-Century Mess made Modern! Chairs get a Re-do.


I found four of these mid-century chairs when we were out shopping a few weeks ago. SCORE!  Ok, my first thought was, "no WAY these are going anywhere near the house." The fabric was absolutely disgusting. As in, I should have worn rubber gloves to take them apart.

We hauled them home on the trailer, and put them in the garage. Then immediately scrubbed our hands.


 I disassembled them and, yes, cut right through that nasty old fabric.


The backrest of the chairs was a different style than I've upholstered before, but luckily wasn't too tricky once I looked at the way it was done previously.


Basically, you just staple right into the bottom side of the backrest, wrap the fabric around, fold it over so you get a nice finished edge, and staple right back along the bottom. Then, staple the sides, leaving room for the hardware holes to secure it back to the chair frame.


Here is the chair with just the seat cushion completed. I'm loving this fun fabric. It lends even more "modern" to the Mid-Century Modern style of the chairs. And after what they've been through in their lifetimes, they deserve a little love and excitement.


Excuse the crummy iPhone photos - I'll stage a better shot in the house, and upload when I have time. One down, three to go - I can just picture these around a white pedestal-base table, or tulip-style table. Or, for something even more dramatic, a round black table. 


Where would you put them?  Have you done any chair makeovers? What's the hardest thing you've reupholstered?


Linking up to: Savvy Southern StyleLady Behind the CurtainPolka Dots on Parade,

Friday, May 3, 2013

A Fan Challenge: Repurposed DIY Projects. With a Prize!

We've just surpassed 5,000 fans on our Facebook page, and we wanted to do something fun to celebrate!

Remember those Carver Junk Company Mission definitions we posted on Facebook this week? Well, one of them is Repurpose, so....


We're inviting you to share your own Repurposed DIY projects with us, and we're giving away a Carver Junk Company gift certificate to one lucky winner!

Here's the fine print:
  • Email us a photo of a project that you COMPLETED, where you repurposed an item for something other than it's original intended use. For example, we fixed up an old railroad cart to use as a coffee table. It doesn't have to be on such a large scale, though - any project is fair game, as long as it's yours!
  • If you were inspired by Pinterest, go ahead and include a link to the original pin that inspired you. 
  • We will post the photos on our Facebook page {and on this blog}. By submitting photos, you are giving us permission to post them in both locations. {Please only submit photos to which you own the copyright. If you get us kicked off Facebook for violating someone else's copyright, we probably can't be friends anymore.}
  • The photo with the most 'Likes' at the end of the contest will receive a $25 gift certificate to Carver Junk Company!
  • Email address for submissions:  challenge@carverjunkcompany.com

There are no entry restrictions based on where you live. We love ALL of our fans. However, the gift certificate must be used for an in-store purchase. If you're from out of town, it would make a great gift for your favorite person in Minnesota!

And lastly, a huge thank you to all of you who have loved and supported our vision, our store, and our dreams. This has turned from a pie-in-the-sky bucket list item, into a very real, "holy crap we're actually doing this and people seem to love it and we love it and we can't believe how much fun it is" realization. We've worked really hard, and have met some pretty cool people along the way. We couldn't do it without all of you - and so really, as un-cheesily as possible, we THANK YOU!

Chad and Brandy