
And then this adventure called Carver Junk Company happened, and getting new bedroom furniture took a backseat to everything else. Because, really, it's the last room anyone gets to see when they stop over to see your new place, and so it sorta fell by the wayside.
Don't worry, we weren't sleeping on the floor or tenting it or anything - my parents got us a new mattress for my birthday/Christmas/Chad's birthday/my next three birthdays and a few more Christmases. So we at least sleep well in our otherwise un-furnished bedroom.
And then we stumbled upon this guy online:

I had to do a little convincing, but Chad came around to the idea of re-doing him as our own dresser (versus for the store), when he checked out how sturdy and well-made he was. I call him Chester. Chester Drawers.
Here are a few more close-ups of Chester before his plastic surgery:
.jpg)

There was a lot of chipped veneer on the structure of the dresser itself, but the drawers were in great shape. I was able to tell by looking at the chipped spots on the edges that the veneer was a nice, thick veneer - which meant it was safe to sand it a bit, and not risk sanding down to the base underneath.
After doing a ton of googling to find a style we liked, we settled on something similar to this. Our dresser even has the same Hepplewhite pulls (don't worry, I didn't know it until I saw this image....).

I started the process of sanding down the "bones" first - I used a 60-grit, and sanded the whole thing to get the glossy finish off, knowing it didn't have to be perfect, since I was going to paint. I got really lucky on the chippy parts - I was able to sand them smooth enough that I didn't need to putty the chips to make it nice and even. I did a quick once-over after the 60-grit with a 220-grit, to get it all nice and smooth. Wiped the dust off with a tack cloth, and it was ready for paint.
I primed with an oil-based primer, because I'd read here that it was best for getting a nice, even finish and long-lasting durability. It's safe to paint a latex paint over an oil-based primer, just not over another oil-based paint (the PRIMER part is key here). For the top coat, we chose a white that had a slight creamy-gray tone to it.
Then, I moved to the drawers - because the veneer was in such good shape, I was able to sand them down with 100-grit, completely removing the old finish.

Then, I used a walnut-colored stain - I brushed it on with a chip brush (the cheap $.99 ones from Home Depot), let it sit for about 30 seconds, and wiped it off with a clean cloth (an old t-shirt I cut up for rags). Eeeeeee! So beautiful I could hardly stand it! I ran inside and INSISTED Chad come look at it immediately. Luckily, he was equally in love, and I finished the rest of the drawers the same.


Once done (after a few more happy dances and standing and staring for long periods of time), I painted the hardware the same color as the body. I forgot to photo this step, probably because it was so painful. I think we could have opted to spray paint them in a close-enough-that-no-one-will-notice color, and been just as happy....oh well. Live and learn.
Last step? A quick coat of wax to harden it all up, and keep the finish from scratching.
And.....here's his after!
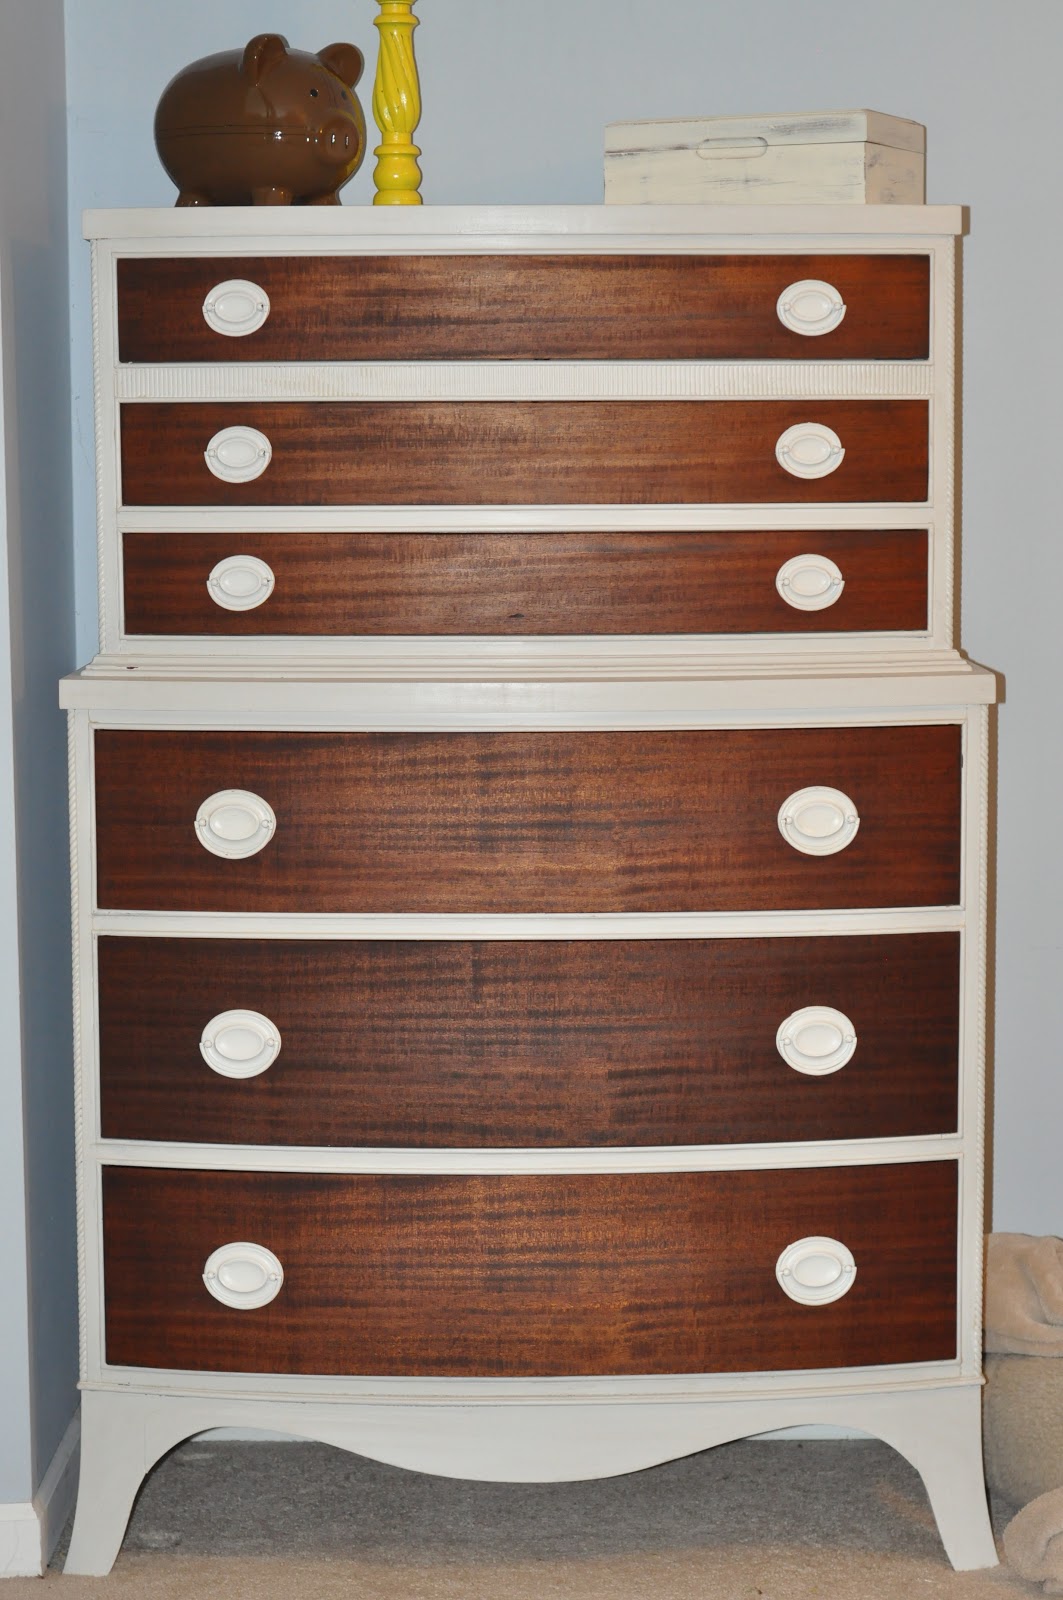
I think we should now call him Chesterfield, or something more distinguished. Isn't he a beauty? I can't even begin to tell you how excited we are - we immediately contemplated putting him in the shop instead of keeping him for ourselves, because it feels like such an accomplishment - but then we decided it was time to stop living out of boxes, and if we waited for another dresser to come around, we might never get rid of the cardboard dressers in our bedroom.
Here's another with the before and after:

We love him! Have you refinished any dressers or other furniture lately? What do you think about the two-tone style we gave Chester?
Linking Up To: Southern Lovely, Boogieboard Cottage, DIY by Design
WOW! (found you on Southern Lovely) This looks amazing, I love the two tone and that wood looks so much better after you cleaned him up, Chester Drawers too funny, Chesterfield is def more fitting for hime now. You did such an amazing job!
ReplyDelete