Showing posts with label wax. Show all posts

Tuesday, April 23, 2013

Vintage Frames - DIY Chalkboard

As we plan for our vintage-styled wedding, we know that we want chalkboards throughout our venue, as signs, welcome notes, and little notes of instruction for our guests.

They'll say things like:  

"Today two families become one, so please choose a seat, not a side."  {near the entrance to the ceremony}
"For your tears of happiness."  {beside a basket filled with vintage handkerchiefs}
"Our love story....."  {alongside the barn door we're using to display a photo timeline}


Ever the DIY-ers, we found some great frames that weren't quite right, and updated them a bit. Here they are Before:


We don't have any in progress photos, but here are the basic steps:

1. Clean, and remove any wires or staples from the back of each frame.
2. Make DIY chalk paint - we use plaster of paris and latex paint. For these frames, we used a grayish white paint.
3. Two coats of chalk paint, and a little distressing with a 220 grit sandpaper.
4. For some chalkboards, we use chalkboard paint on glass, wood, or whatever surface comes with the frame. These ones were empty when we got them, so we bought a sheet of blackboard/chalkboard....board....and cut it to size for each frame. 
5. You could attach the board to the frame in a few different ways. You could use staples, or whatever was in the frame to start with. You could get those little screw-in things that spin, like on the back of Target picture frames. Or...you could glue it. We used Gorilla glue, turned the frames upside down, and put a gallon of paint on them to ensure it set properly overnight.
6. Finish the frame (not the board) with a layer of clear wax. For a little more rustic feel, you could also put on a coat of dark wax!

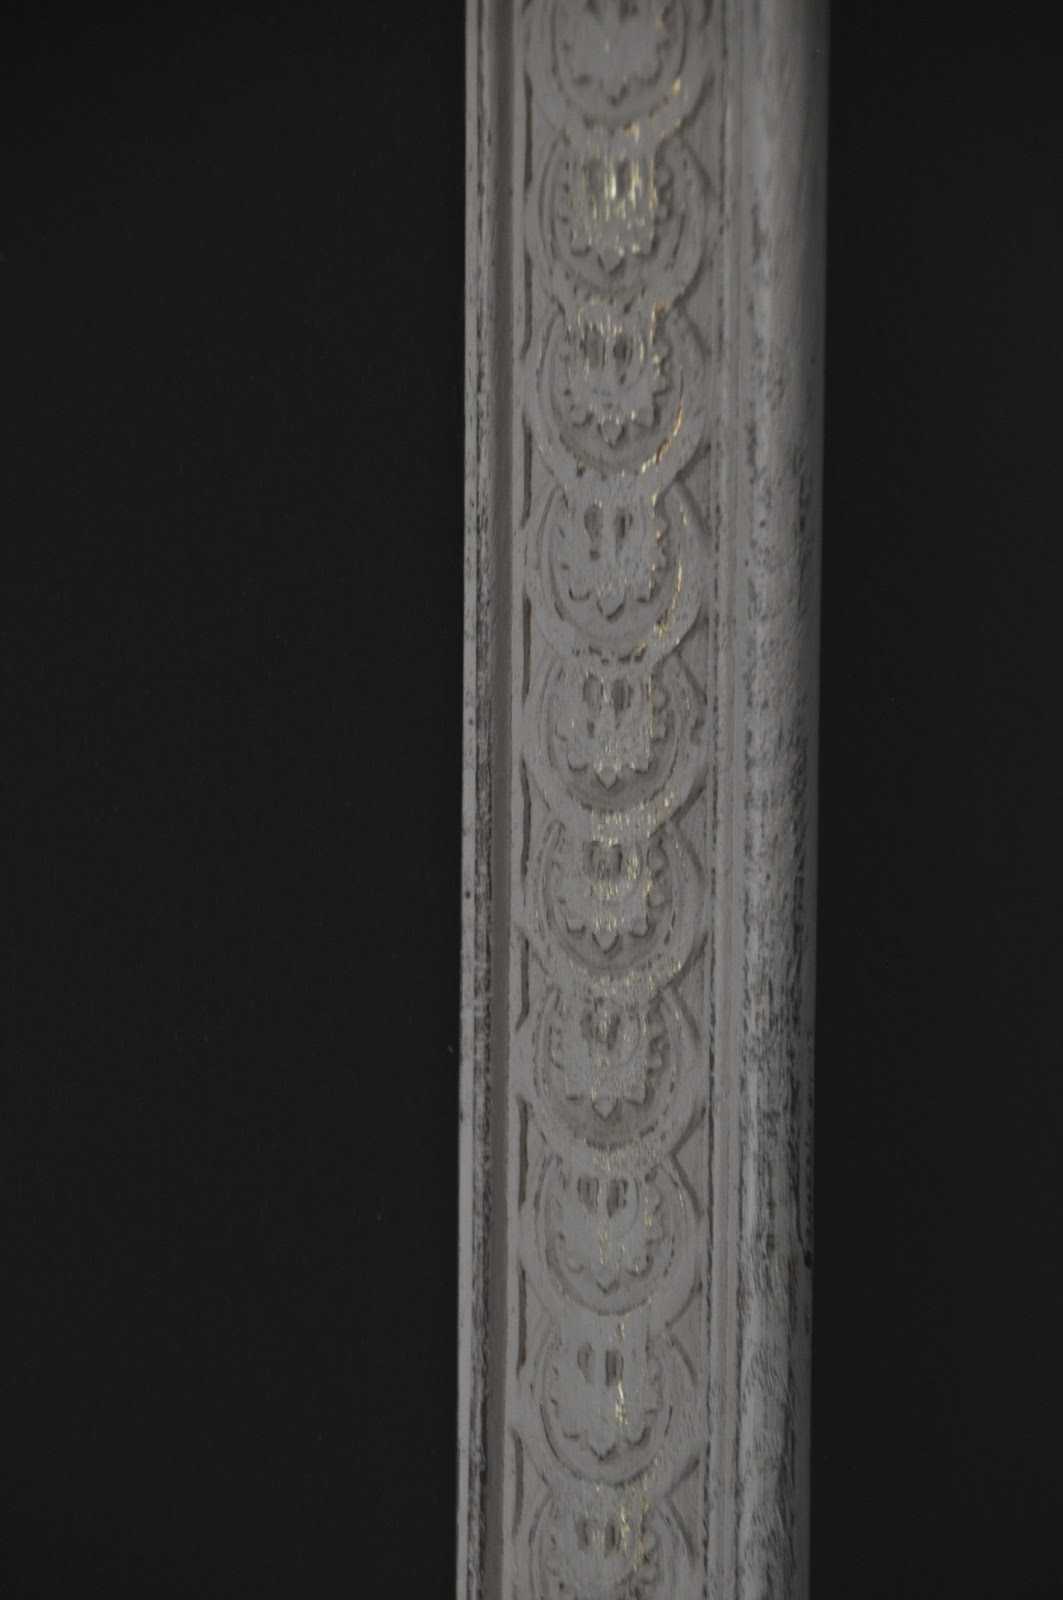
Ta-Da!  Do you love the little bit of gold peeking through the white paint? 


We're so excited to letter these up, we may just have them done months before the wedding!  {yeah, right...along with all of the other projects on the list. something tells me these will be day-before projects...}

Have you ever made a chalkboard? Did you use paint or pre-made chalkboard? What did you use it for - kitchen, menu, wedding, homework, to-do list??  What questions do you have about how we did these ones??


Linking up to: {Primp}, Savvy Southern Style, Vintage on a Dime, Not Just a Housewife, 

Thursday, March 14, 2013

Dorothy the Dresser gets a little makeover

I'm not paint-happy. At least not overly paint-happy. I swear. I appreciate a good, pristine piece of wood without any colored stuff on it as much as the next person. In fact, maybe more than a lot of people. Looooove me some walnut wood, in any shade or shape.

Buuuuuut, I also know a lady in need of some makeup when I see one. Let's face it, I have lots of practice looking in the mirror each morning. {I kid, I kid. I rarely wear makeup either.}

This lovely lady came along to us in early January. I named her Dorothy. Anything I spend more than a few hours with, getting to know as intimately as this, deserves a name. Remember Chester?  Anyway, Dorothy was actually in pretty good shape structurally. Except, her left side was a little wrinkly. I mean, that's natural. She's nearly 100 years old, if I have her dates right - I'm thinking 1920s. Her veneer was all chippy, wavy and peely on that right side.


Nonetheless, I was willing to give this lovely lady a shot at a new home just as she was. I asked for some opinions when I posted her on Facebook, and the responses were mixed. Some said paint, some said "don't you dare." Mind you, I didn't post a photo of her wrinkles...so she looked pretty good to those folks. Oh well. I left her be. She sat in the store for 2+ months, with no luck finding a home. So, I decided to give her a little makeover.

Here's how it went down {I am an ultimate picture-taker. Except when I need to be. Then I forget.}:

1. Homemade chalk paint, made from a can of oops paint I picked up at Home Depot for $2.00. I call it creamy gray.

2. Peeled, sanded, patched, sanded her rough spots on the side.

3. Painted two coats of homemade chalk paint in creamy gray. I think it needs a more glamourous name. Perhaps Dorothy Gray from now on? She looks delicious! In a non-edible kind of way. But also a little like a mime, if we're sticking with the makeup theme. {ie, super white and ....white.}

4. An orbital sander with 220 grit sandpaper across her detailed bits, and the edges of the drawers. Whoop, she's coming alive! It's like we just added a little blush and mascara!

5. Now for the bronzer and eyeliner. {Am I taking the analogy a bit too far?} I coated her distressed self with a clear wax all over. I let it dry about 10 minutes, and then used a soft dark wax - a little more around the edges and details, a little less in the open parts. I left the dark wax on for literally about 30 seconds, and then wiped it with a clean rag. I buffed it until I liked the way it blended into the details and feathered out to the creamier gray in other areas, then coated it with another round of clear wax. This removed even a bit more of the dark wax, and evened it all out.

6. Let 'er dry about 20 minutes, and buffed her to a beautiful, waxy shine!

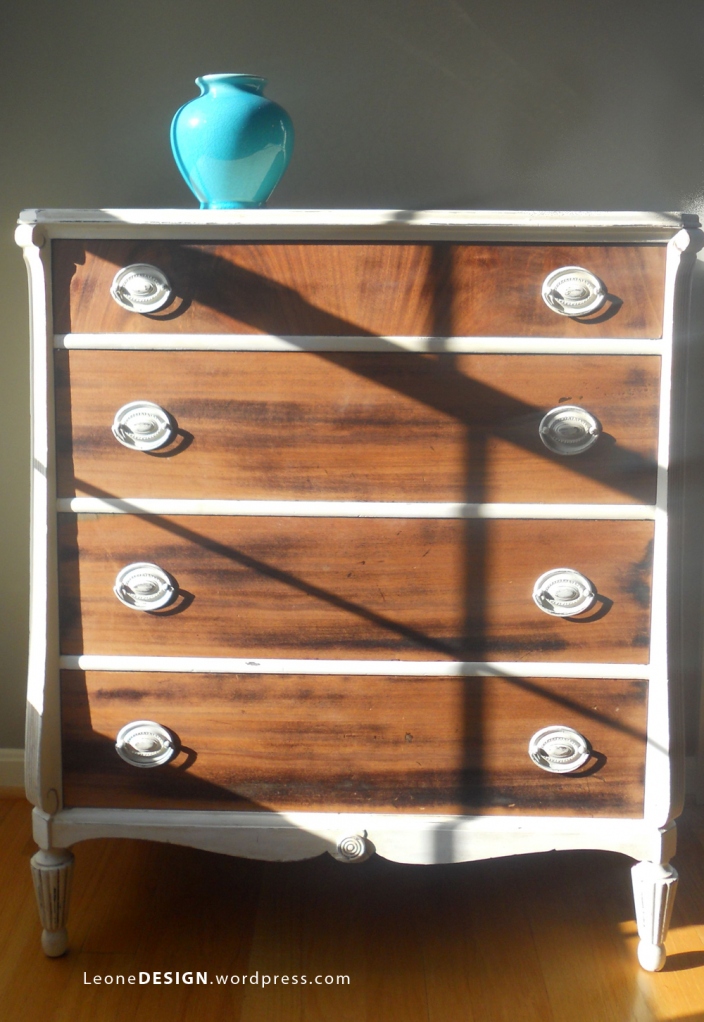
And now, her big reveal. Meet Dorothy!


I just love how the gold/brass hardware plays so nicely with the dark waxed detail and the wood showing through where she's distressed!

What do you think? Have you done any furniture makeovers lately? What's your favorite way to distress and/or wax a piece of furniture?


Linking to: http://www.cozylittlehouse.com/2013/04/tweak-it-tuesday-37/

Friday, December 21, 2012

French-Kissed - A Little Dresser Before and After

French kissed. Clever, huh? Maybe that's what we should call our new paint color creation, which we mixed up just for this french provinicial-style dresser we madeover last weekend. Or...maybe we should stick to junking, and painting....and not clever-blog-title-writing....

Here's her before {oh, and don't ask how I decide which furniture pieces are "he" vs. "she" - I just use whichever seems right at the time...in this case, she's curvy, flirty, and just downright pretty. So, she's a "she."}

Before: Pretty good shape. Clean. Boring (please don't be offended if you love her Before. she hung out in the store for 3 months in her Before state, and no one loved her enough to give her a new home).


After.  Homemade chalk paint, mixed with our own version of Tiffany blue paint (now known as French Kissed), and white painted hardware. Two coats of paint, a couple coats of wax, and she's officially made-over!


Within an hour of posting on Facebook, she was sold! She never even made it back to the store, but we're so happy she's going to a 9-year old girl. What an awesome Christmas surprise! {though we're sure this was just an add-on to the rest of her more typical 9-year old gifts!}

Have an awesome pre-Christmas weekend. Happy Holidays from our family to yours.


Linking to:
http://www.sugarbeecrafts.com/2013/04/take-look-tuesday_22.html?m=1
http://www.salttree.net/2013/04/salttree-social-51.html?m=1

Tuesday, December 18, 2012

A New Space for a New Year!

Exciting news: {drumroll please.....}       We're Moving!

If you follow us on Facebook, you may have already seen the announcement, but here are some more details.

Monday, December 3, 2012

Railroad Cart Reveal - our new coffee table

I'm running a little short on time this morning, but want to get this before/after post up before the week gets even more crazy!  The shop is open Thursday - Saturday this weekend, which always means tons of last-minute work to do to get it ready. Like pricing all the new items we've brought in!

Pretend this is one of those MadLibs-type blog posts, and fill in the captions (outloud or silently) as you go. The end result will be "Here is the super awesome finished cart in our new, not-yet-accessorized living room."


So, what was your favorite caption? Have you done anything this ambitous for your own house? How did it turn out?! Share a link to the photos!

Sunday, October 28, 2012

Our Chest of Drawers Gets Plastic Surgery (this is more than a makeover)

When we moved to our new house, we sold all of our bedroom furniture. As in every. last. piece. It just didn't fit the size and style of the new place, and it felt fun to get to totally reinvent the room!

And then this adventure called Carver Junk Company happened, and getting new bedroom furniture took a backseat to everything else. Because, really, it's the last room anyone gets to see when they stop over to see your new place, and so it sorta fell by the wayside.

Don't worry, we weren't sleeping on the floor or tenting it or anything - my parents got us a new mattress for my birthday/Christmas/Chad's birthday/my next three birthdays and a few more Christmases. So we at least sleep well in our otherwise un-furnished bedroom.

And then we stumbled upon this guy online:


I had to do a little convincing, but Chad came around to the idea of re-doing him as our own dresser (versus for the store), when he checked out how sturdy and well-made he was. I call him Chester. Chester Drawers.

Here are a few more close-ups of Chester before his plastic surgery:


There was a lot of chipped veneer on the structure of the dresser itself, but the drawers were in great shape. I was able to tell by looking at the chipped spots on the edges that the veneer was a nice, thick veneer - which meant it was safe to sand it a bit, and not risk sanding down to the base underneath.

After doing a ton of googling to find a style we liked, we settled on something similar to this. Our dresser even has the same Hepplewhite pulls (don't worry, I didn't know it until I saw this image....).


I started the process of sanding down the "bones" first - I used a 60-grit, and sanded the whole thing to get the glossy finish off, knowing it didn't have to be perfect, since I was going to paint. I got really lucky on the chippy parts - I was able to sand them smooth enough that I didn't need to putty the chips to make it nice and even. I did a quick once-over after the 60-grit with a 220-grit, to get it all nice and smooth. Wiped the dust off with a tack cloth, and it was ready for paint.

I primed with an oil-based primer, because I'd read here that it was best for getting a nice, even finish and long-lasting durability. It's safe to paint a latex paint over an oil-based primer, just not over another oil-based paint (the PRIMER part is key here). For the top coat, we chose a white that had a slight creamy-gray tone to it.

Then, I moved to the drawers - because the veneer was in such good shape, I was able to sand them down with 100-grit, completely removing the old finish.


Then, I used a walnut-colored stain - I brushed it on with a chip brush (the cheap $.99 ones from Home Depot), let it sit for about 30 seconds, and wiped it off with a clean cloth (an old t-shirt I cut up for rags). Eeeeeee! So beautiful I could hardly stand it! I ran inside and INSISTED Chad come look at it immediately. Luckily, he was equally in love, and I finished the rest of the drawers the same.


Once done (after a few more happy dances and standing and staring for long periods of time), I painted the hardware the same color as the body. I forgot to photo this step, probably because it was so painful. I think we could have opted to spray paint them in a close-enough-that-no-one-will-notice color, and been just as happy....oh well. Live and learn.

Last step? A quick coat of wax to harden it all up, and keep the finish from scratching.

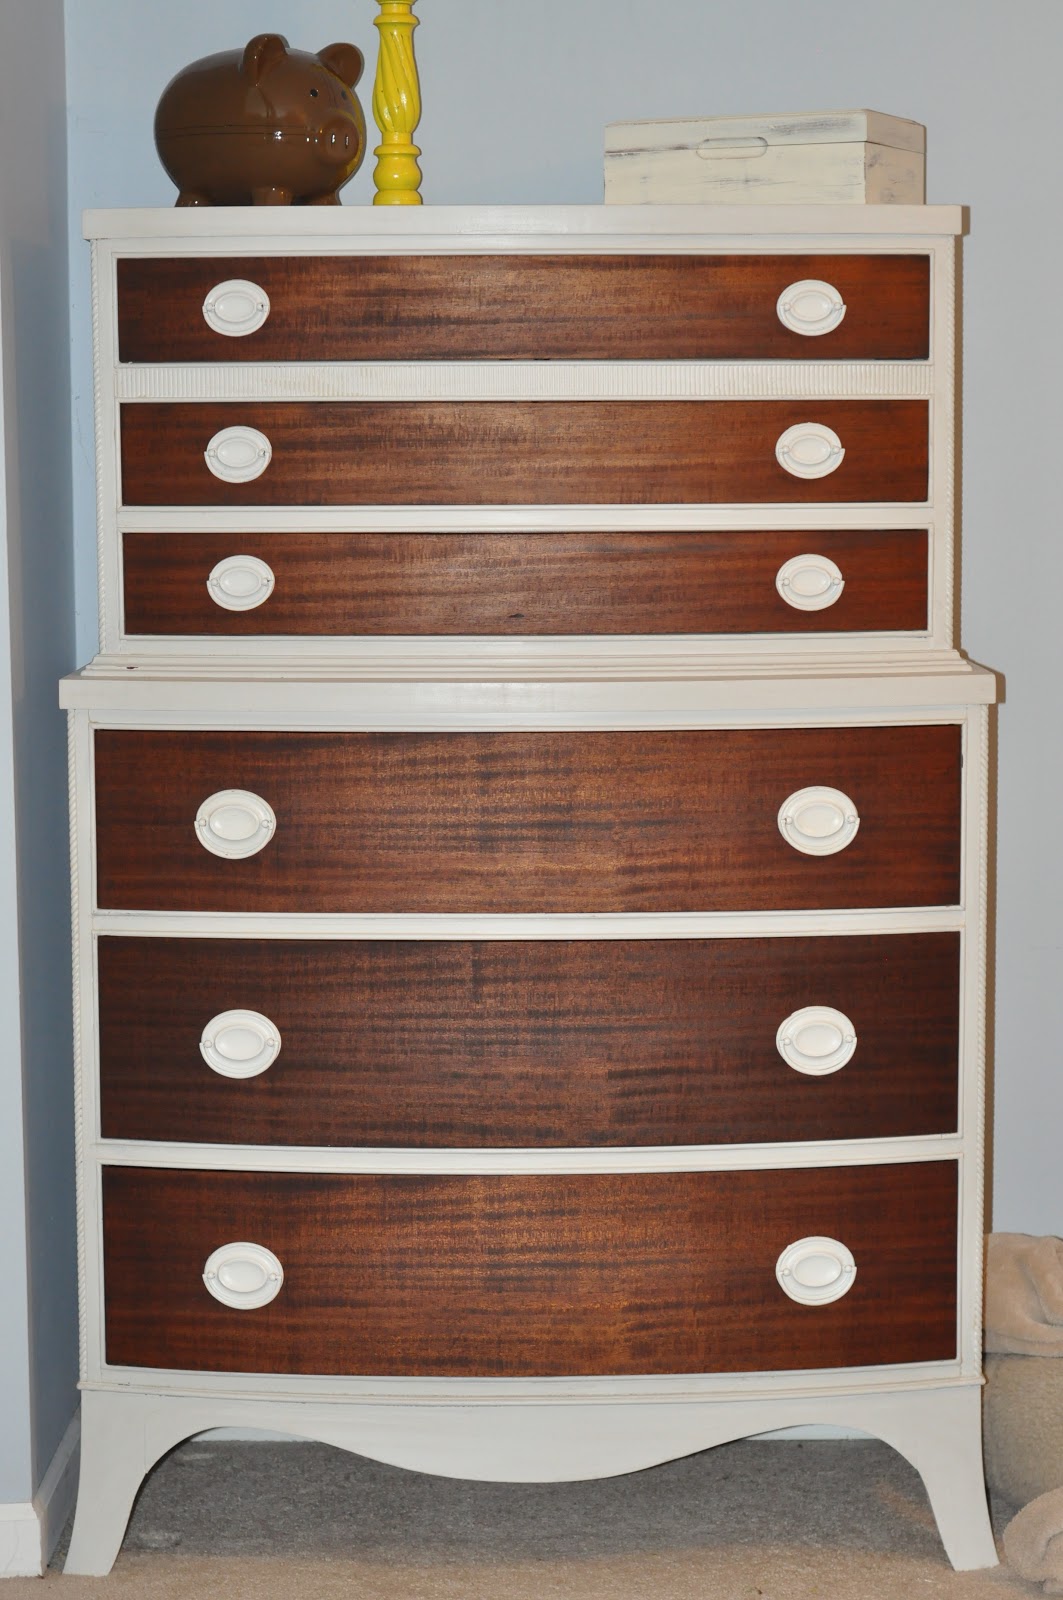
And.....here's his after!


I think we should now call him Chesterfield, or something more distinguished. Isn't he a beauty? I can't even begin to tell you how excited we are - we immediately contemplated putting him in the shop instead of keeping him for ourselves, because it feels like such an accomplishment - but then we decided it was time to stop living out of boxes, and if we waited for another dresser to come around, we might never get rid of the cardboard dressers in our bedroom.

Here's another with the before and after:


We love him! Have you refinished any dressers or other furniture lately? What do you think about the two-tone style we gave Chester?


Linking Up To:  Southern Lovely, Boogieboard Cottage, DIY by Design