Showing posts with label vintage. Show all posts

Tuesday, February 25, 2014

If only it were as easy as Flea Market Flip. A re-finishing rant.

A friend, and one of our dealers at Carver Junk, sent me this blog post a few weeks ago. It hit home, and I've been trying to think of a way to post it for our fans/followers/customers to see, without making it seem cranky. While noodling on how to do that, I've also been (completely unrelated) DVR'ing episodes of Flea Market Flip, and catching up on them on Sunday nights. We've had a ton of people ask us if we've ever seen the show, because they "LOVE IT!"

Well, here's the scoop on Flea Market Flip. It's completely unrealistic, and gives viewers the impression that big repurposing projects can be completed with quality in less than 24 hours with no additional cost beyond the original purchase price {seriously, who is paying for all that paint, and all the people helping the flippers do the work?!}. And unfortunately, it leads some {not all} of those viewers to expect much lower prices than are feasible at stores like Carver Junk Company.

To illustrate, let's talk about a piece we bought recently, and repainted:

A round pedestal table - priced at $40. The price was fair, so we didn't low-ball or negotiate. We drove 20 miles to pick it up. Because the woman selling it wasn't able to help Chad move it, both he and I had to go, costing us both time - it took about an hour there and back.

I forgot to take a Before photo, so I borrowed this from an online post.
It is pretty darn close to the table we bought.
although the veneer on this one is in better shape; price is also higher}.
Purchase price:  $40
Gas: $7  {yes, our Jeep stinks for gas mileage, but it's great for hauling our trailer}
Time: $40 {we value our time at $20 per hour}

Then, when we got there, we found the reason the table was only $40 {which, of course hadn't been shared when we asked the condition} - the veneer was bubbling on both the top and the leaf for the table. Add an extra 30 minutes of veneer-fixing time.

Fixing: $10

Once it was prepped {fixing the veneer}, we were ready to paint. We use Milk Paint or homemade chalk paint, both of which require no sanding prior. Woohoo! Time savers! But, what we make up for in time, we lose in cost of paint. It's worth it, trust us.

Milk Paint: $18
Wax: $3  {a small portion of a large container used}
Sandpaper, brushes, etc:  $3  {brushes are reused, sandpaper is cheap, but let's add something for supplies}
Bonding agent: $7  {ensures the paint sticks and doesn't require the sanding prep work}

Painting with Milk Paint is actually a time SAVER, because it dries so quickly. We chose a light color, so that meant it required a couple of coats. We'll call it three. Each coat takes about 20 minutes, so we're looking at an hour.

Painting Time:  $20
Distressing/Waxing Time: $3  {about 10 minutes}

It's done! That's it, right? Well, there is also the rent {and utilities} that we have to pay in order to have a place to showcase the table.

Sq Ft Rent for Table:  $25 per month, but we'll assume it sells in one month. It's also possible that it sells in the first day of the sale, and we replace it with something else that sells - this is ideal :)

And there are the folks we have to pay to work at the store while we're open. That only adds a small cost to each item, so we won't even add it here - but it's important to note the number of things that go into "selling" furniture!

So, what does that total look like?
Purchase price:  $40
Gas: $7
Time: $40
Fixing: $10
Milk Paint: $18
Wax: $3
Sandpaper, brushes, etc:  $3
Bonding agent: $7
Painting Time:  $20
Distressing/Waxing Time: $3
Sq Ft Rent for Table:  $25

This table COST us $176 to buy, paint, and put in the store. We'd likely price this table at $249 {which is determined by a lot of factors like our market, the piece itself, current demand for this type of item, etc.}

Can you see all the distressed and chippy goodness in this photo? And the finish feels like butter.


Well, it's apparent that we aren't professional photographers, but here is the finished table, with leaf.
It's she a beauty??

So once we've paid ourselves, the bills, and sold the table, we will have $73 left over to go buy another piece of furniture and start the process all over again.

And just for kicks, let's compare our table {$249} to a couple of major retail store tables & prices:
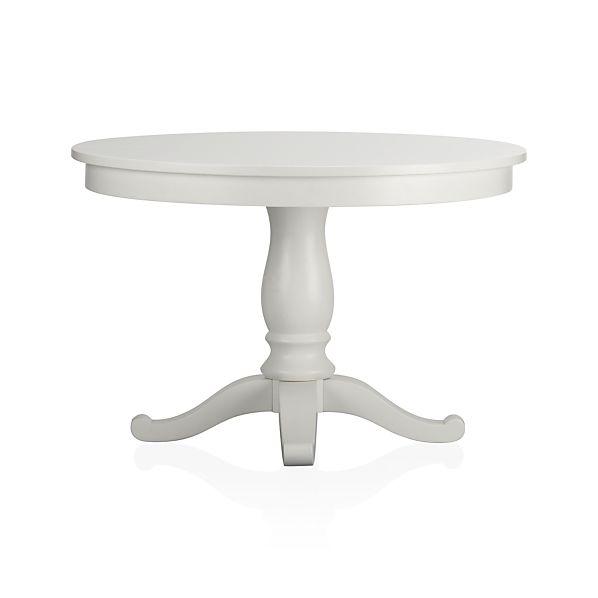

Crate & Barrel,  $499
Pottery Barn, $799

Now, let's be clear. I am not complaining. We LOVE what we do, we LOVE our customers, and we RARELY encounter a situation where someone is disrespectful about pricing. I didn't blog about this in an effort to change anything that happens in our store, nor to make you feel sorry for us - it truly is more about education. In fact, we even offer painting workshops through Carver Junk, so YOU can do these projects yourself if you like! And now, you'll have an idea of what it will cost you in time and real dollars.

{and, you won't be fooled by shows like Flea Market Flip! watch, enjoy, and take it as a great entertainment show :)  }

Tuesday, June 11, 2013

Collect Junk You Love!


Some of the things in our home that we love, and are authentic to us:

Los Angeles Pottery Co, "Cookies All Over" cookie jar. It's not beautiful, and it's not modern, but it was my grandmother's. It is the cookie jar that I used to steal those little rectangle-shaped waffle cookies with the cream filling from when I was four. And now it's a great spot to store dog treats!


Nescafe Vintage World Mugs. They are not hand-me-downs, but they are vintage. And they are the same as the ones my grandma {my Mamo} used to make chocolate pudding in when my cousin and I were young. I found two sets of four mugs at a vintage sale two years ago. I immediately called my Dad {before leaving the store} to make sure my six-year-old memories were remembering the same mugs. Before I even finished describing the "mugs Mamo used to make pudding in," he responded with "those Nescafe mugs with the World on them!"  I bought both sets, and gave one to my cousin. We use them as espresso cups in our house, and one day, I will serve chocolate pudding in them to our children.


Our styles are a mix of more traditional and rustic (Chad), and more vintage and modern (Me). Our compromises are many, in that we choose most things in our home together. And they are few, in that when we find the perfect piece, neither of us usually feels like we've compromised our own style. Our curtains are an awesome example. We looked for months for the right curtains for the dining room of our previous house. And found nothing. So, I convinced Chad to let me make some, if we could find the perfect fabric. He was apprehensive {admittedly, he'd never seen me sew anything at this point....}, but agreed. And then I went out on a limb and suggested {one of hundreds of suggestions} a fabric I thought he'd hate. He LOVED it! And now, this fabric is the basis of our living and dining room decor:


Oh yeah, we were SO ahead of the trend on the suzani pattern fabric. {and we're humble, too} See that pop of aqua in the fabric? We've pulled out a brighter version of that for our TV stand, and our soon-to-be kitchen island stools. This is our kitchen inspiration {apologies, don't know source, it's from Pinterest}:


The kitchen is a work in progress, but someday we'll get some photos up, so you can see how we're progressing against our inspiration piece, vs. what we've changed to be more authentically "us."

As far as other things we LOVE: white leather couches. Have I mentioned we have three dogs? Oh yeah, we have. And we STILL LOVE white leather couches.  We had these ones in our old house {you get a little peek at our old home before and after}:


And when we moved, the two separate, matching sofas wouldn't fit into the configuration of our new house. Boo!! We loved the setup the previous owners' had, which included a sectional in the corner of the living room. So we got this:


But it just wasn't "us."  It was one of those compromises where we both felt we compromised. And so we sold it, and bought this {whoops, only have photos of it that include the dogs sitting on it. proof that it's durable!! .....and proof that our house is sometimes messy well-lived-in}:


Ahhhh.....so much better. Oh yeah, and we painted the walls gray to make the white trim "pop." And yeah, we have a photo canvas on the wall of our three dogs sitting on the {old} white leather couch. Because we love them. And that photo. And that couch. And they are a huge part of our lives! 


So that's the rundown of just a few of the things that we collect and love around our house. We have moved twice in the last few years, which has provided us a great opportunity to de-clutter and remove the things we don't truly LOVE. Which has led to a house full of things we DO love, and a lot of things that tell our story.

What's your favorite, most-authentically-you, loved item in your home?


Sunday, June 9, 2013

Whimsical Vintage-Inspired Rustic Wedding Invitations

Whimsical Rustic Vintage-Inspired-Wedding Invitations. Whew, that's a mouthful. Perhaps our wedding has an identity crisis??  We prefer to think of it as the perfect eclectic mix of "us"-ness, all rolled into one big event!

The wedding is on a farm, with the ceremony taking place outside under a big tree, that will be backed with flag banners (or, bunting, as Etsy calls them). They'll match the ones you see on the top of the invitation and RSVP card below. They'll be made primarily from vintage fabric. And they are the one common theme running through the entire wedding, along with the colors. The bunting will also hang from the ceiling of the barn, where our reception will take place, seated at tables with handmade paper flowers in vintage white milk-glass vases.

So it breaks down a little like this:
Farm/Barn:  Rustic
Materials/Decor: Vintage
Colors/Decor/"Feeling": Whimsical
All of these combined: Chad and Brandy (that's us)!

Here's a little peek at the invitations and RSVP cards we are sending out. 


We had originally intended to just stack them, stamp them, stuff them, and send them off. But that didn't feel like an exciting enough "first look" into the flavor of our wedding, for those who would be receiving the invites. So, I spiced it up a bit, with some yarn left over from the yarn flowers I'm making (more to come on that another day.


Better, but still kind of boring. The color matched, but it was still missing the "rustic" part of the vibe. I was doing this all on the dining room table, and as I took the photo, I looked at the burlap runner sitting next to the invite, and thought, "huh. that could be cool...." and snipped off a corner. Yep, just cut out a square of the dining room table runner. I'm crazy like that.  {side note, we have more burlap than I know what to do with, I can make another.} I cut it just barely larger than the RSVP card. 


Perfect! I showed Chad, he loved it, and then, being all practical-guy-like, said "that's going to be a lot of work to do for EVERY invitation. Is it really worth it?" Ugh, yes. Of course it is. Plus, my momma is going to help stuff the invitations, and she won't mind. 

But I did decide that I needed a way to mass-produce the different pieces. Invitations, check. Smartpress.com mass-produced those for us. We <3 them. Plus, they are local - right in our backyard! {Chaska, MN}


I took the perfect length I'd already cut, and walked around the dining room until I could find something that was the same length as that single piece. I discovered that if I wrapped it around the top portion of the chair, exactly one time around was the same length. So I went to town! I wrapped that whole skein of yarn around the back of the chair, counting for a while until my attention span gave out, until it was approximately 150 turns around the chair. Then I just cut the whole thing in one spot. Voila! ALL of my strings cut at once. See, Chad? It won't be so hard, after all!


Ramsey couldn't figure out what the heck was going on. And how was that ball of string moving all by itself?! Unfortunately, she wasn't much help.


But check this out! Remember the Sola Flower Pomander Ball we posted last week? Check out how the colors match! {look at the oranges and pinks in the little flags below - not the yarn. Fun!}


So there it is! My favorite part?  The cheeky comment at the bottom of the RSVP Card that says, "RSVP by August 1st, or bring a sandwich and a lawn chair."  Haha! And we mean it. 

Oh, P.S. Smartpress.com did our printing, but we got the original templates for our Save the Dates, Invitations, and RSVP cards from Weddingchicks.com. They have some awesome free template downloads - in fact, you can type the info right into their website, and they give you a finished file! We loved the basis of the templates, but wanted to customize our wording a bit more, change up some fonts, etc - and Chad's a photoshop wizard. You won't get exactly what you see here off Weddingchicks.com, but they definitely are a great budget {ie, free} place to start!!

Sunday, June 2, 2013

I got a new toy! Hamilton Beach Vintage 1940s Stand Mixer.

Whoohoo. I found this at a flea market, and I couldn't wait to get it home!  Who needs a $300 kitchenaid from Macy's, when you could have one of these bad boys?!  And after 60+ years of mixin', it still works. BEAUTIFULLY!

I am seriously jumping up and down. Chad, on the other hand, nearly turned down homemade banana bread when he heard it was going to be mixed with my new toy. Seriously!? He never turns down banana bread (nor anything I make, really....). He was worried it wouldn't be clean. Good news - the bowls have been run through the dishwasher, the mixers scrubbed, and the rest washed down with bleach.

Take a look. Are you as in love as I am?


I think she needs a name. Any suggestions??

Saturday, April 27, 2013

Repurposed Mini Globe Pendant Light

We weren't brilliant (oh yes, that was my attempt at a light-related pun...) enough to have come up with the idea of a globe pendant light all by ourselves. I honestly can't remember where I saw it first....Pinterest, most likely. But, we did come across the perfect already-broken mini globe when we were shopping up in the U.P. of Michigan!  The tape had come loose around the center, and it was falling off its base. So, we repurposed it!

We used both halves, making two hanging pendant lights. The pendant light was a kit, and was super easy to put together.

We just cut a hole in the top of each half. Nothing fancy here, I held the bottom of the light socket on the top and traced around it, then cut it with a utility knife. The socket threaded in perfectly, and then for extra security, there is a little round plastic piece that screws onto it from the inside of the globe, sort of sandwiching the globe half within the light socket!  Screwed in an edison bulb from good ol' Home Depot, and hung it up!  It currently plugs into an outlet, but could also be shortened and hard-wired to a switch.

We also use a low-watt bulb in it - still bright enough for light, but the globe is still paper, at the end of the day :)

It's shown here hanging from an antique birdcage stand. {which would also be oh-so-cute for holding a vintage bird cage or wedding decor}!


We think it would be adorable in a nursery or kid's room. Where would you hang it?


Linking Up: Tater Tots and Jello, Be Different, Act Normal,

Tuesday, April 23, 2013

Vintage Frames - DIY Chalkboard

As we plan for our vintage-styled wedding, we know that we want chalkboards throughout our venue, as signs, welcome notes, and little notes of instruction for our guests.

They'll say things like:  

"Today two families become one, so please choose a seat, not a side."  {near the entrance to the ceremony}
"For your tears of happiness."  {beside a basket filled with vintage handkerchiefs}
"Our love story....."  {alongside the barn door we're using to display a photo timeline}


Ever the DIY-ers, we found some great frames that weren't quite right, and updated them a bit. Here they are Before:


We don't have any in progress photos, but here are the basic steps:

1. Clean, and remove any wires or staples from the back of each frame.
2. Make DIY chalk paint - we use plaster of paris and latex paint. For these frames, we used a grayish white paint.
3. Two coats of chalk paint, and a little distressing with a 220 grit sandpaper.
4. For some chalkboards, we use chalkboard paint on glass, wood, or whatever surface comes with the frame. These ones were empty when we got them, so we bought a sheet of blackboard/chalkboard....board....and cut it to size for each frame. 
5. You could attach the board to the frame in a few different ways. You could use staples, or whatever was in the frame to start with. You could get those little screw-in things that spin, like on the back of Target picture frames. Or...you could glue it. We used Gorilla glue, turned the frames upside down, and put a gallon of paint on them to ensure it set properly overnight.
6. Finish the frame (not the board) with a layer of clear wax. For a little more rustic feel, you could also put on a coat of dark wax!

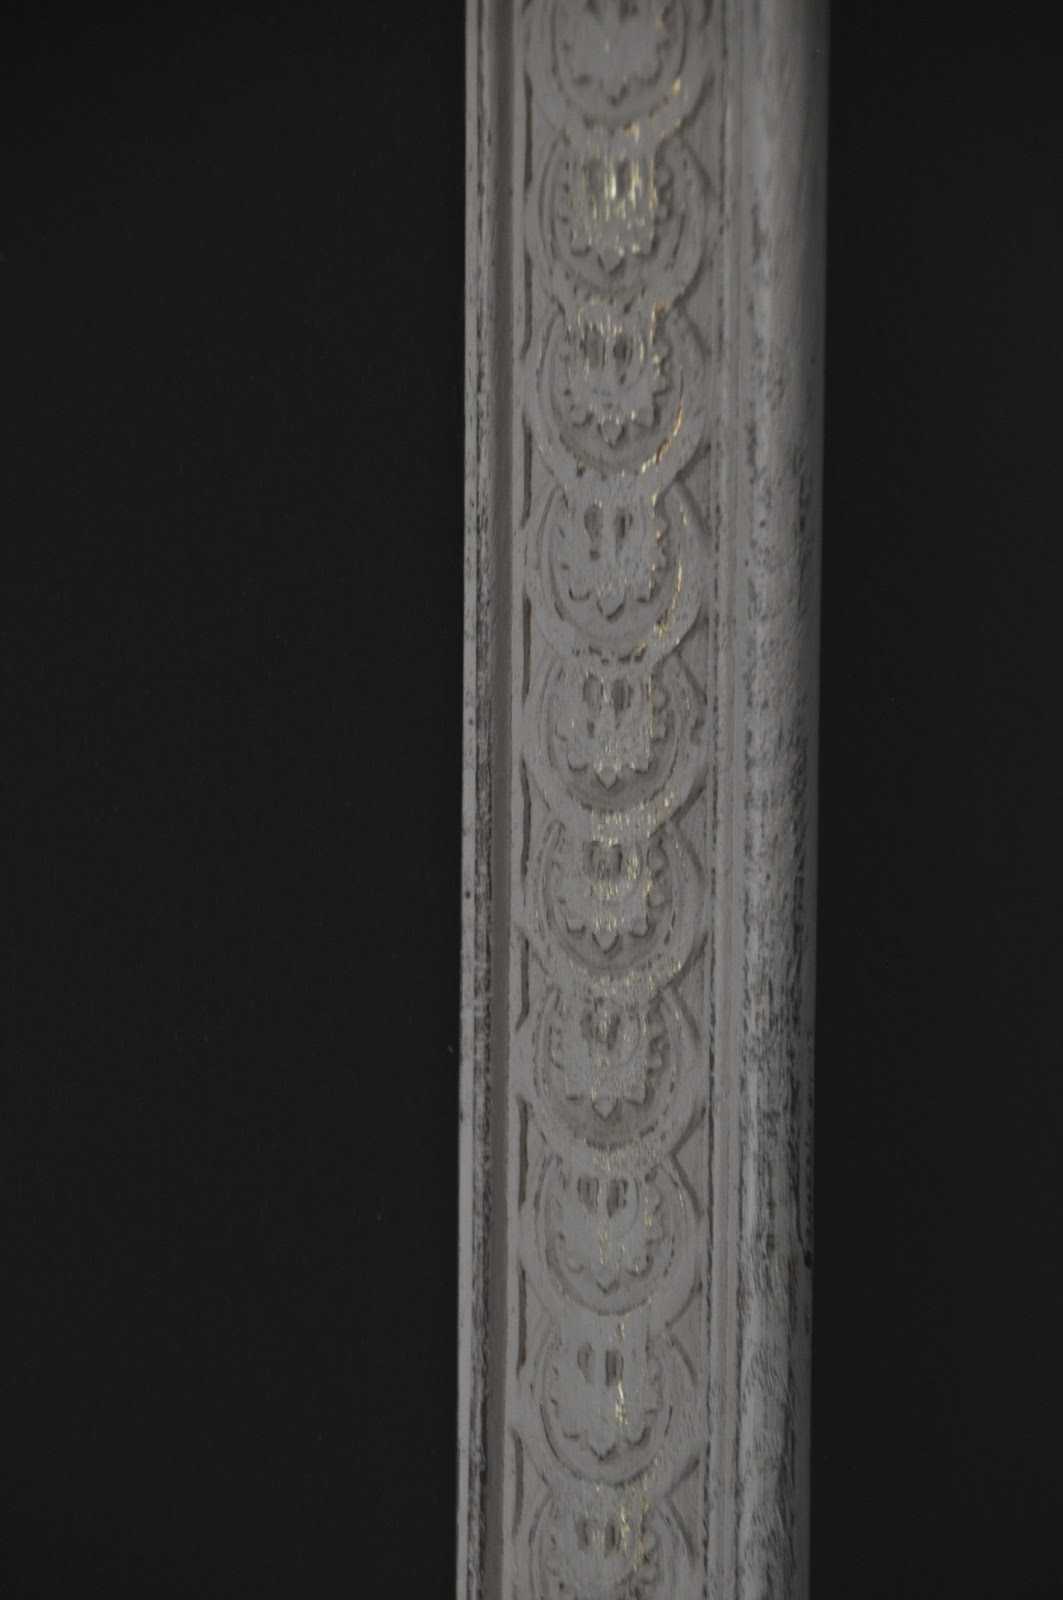
Ta-Da!  Do you love the little bit of gold peeking through the white paint? 


We're so excited to letter these up, we may just have them done months before the wedding!  {yeah, right...along with all of the other projects on the list. something tells me these will be day-before projects...}

Have you ever made a chalkboard? Did you use paint or pre-made chalkboard? What did you use it for - kitchen, menu, wedding, homework, to-do list??  What questions do you have about how we did these ones??


Linking up to: {Primp}, Savvy Southern Style, Vintage on a Dime, Not Just a Housewife, 

Saturday, April 20, 2013

A Two-Tone Furniture Craze.

I'm going to hell. The special place reserved for people who willingly take away the natural beauty of a {nearly} pristine piece of antique furniture. I painted a dresser that didn't need paint. Here is what I keep telling myself to justify my sins:  "It was just sitting there, all lonely in the store, with no one to take it home and love it.  You were just helping it find a home."

It's true. And perhaps I feel slightly less guilty because this painted piece looks absolutely incredible. Different from some of the other styles we've done, it's a little chippier, a little more distressed, and a lot more full of character!

We're on a two-tone craze with our furniture these days. Chad picked out the colors/design on this guy - it's similar coloring to the primitive piece we use at home as our TV stand. The lines were so different than our own piece though, that I wasn't sold on the color choices. But, because I love him, and I realize that sometimes my ideas aren't the ONLY good ideas, I went with it. Aaaaaaand, I love it. We love it. It's perfect, and amazing, and beautiful, and I want to keep it. We need a bigger house.

I didn't take any before shots. Trust me, you don't want to see them. Just know this:  There was some slight veneer chipping all around. One of the drawer fronts had a crack through the veneer, and at one point, the entire side of this guy was repaired, and the innards of the bottom drawer replaced. Yes, I'm still justifying....

Without further ado, here he is:


He's painted in our own specially-created version of turquoise {color matched to a clock we bought to match our favorite custom-made curtain panels}, a creamy grayish-white on the drawers, and all finished with clear and dark wax to seal it up and make it buttery soft and smooth.

Do you love the two-tone look as much as we do? What color combos would you like to see on an old empire-style dresser in the future?

Wednesday, April 10, 2013

Handmade in Minnesota. We Love Local!

Each month, we bring in more and more handmade products. While the majority of our store is vintage, antique, or repurposed, we also love to support local artisans. And by "local" we mean Minnesota-based. Many of our in-house dealers make handmade items of their own to sell at the store. Others come from folks who specialize in a particular craft, and we work with them to provide specific products for the store.

Here are just a few of the handmade items carried at Carver Junk Company:


What other handmade items would you like to see at Carver Junk Company?  We're always looking for inventory suggestions!