Well, here's the scoop on Flea Market Flip. It's completely unrealistic, and gives viewers the impression that big repurposing projects can be completed with quality in less than 24 hours with no additional cost beyond the original purchase price {seriously, who is paying for all that paint, and all the people helping the flippers do the work?!}. And unfortunately, it leads some {not all} of those viewers to expect much lower prices than are feasible at stores like Carver Junk Company.
To illustrate, let's talk about a piece we bought recently, and repainted:
A round pedestal table - priced at $40. The price was fair, so we didn't low-ball or negotiate. We drove 20 miles to pick it up. Because the woman selling it wasn't able to help Chad move it, both he and I had to go, costing us both time - it took about an hour there and back.
Purchase price: $40
Gas: $7 {yes, our Jeep stinks for gas mileage, but it's great for hauling our trailer}
Time: $40 {we value our time at $20 per hour}
Then, when we got there, we found the reason the table was only $40 {which, of course hadn't been shared when we asked the condition} - the veneer was bubbling on both the top and the leaf for the table. Add an extra 30 minutes of veneer-fixing time.
Fixing: $10
Once it was prepped {fixing the veneer}, we were ready to paint. We use Milk Paint or homemade chalk paint, both of which require no sanding prior. Woohoo! Time savers! But, what we make up for in time, we lose in cost of paint. It's worth it, trust us.
Milk Paint: $18
Wax: $3 {a small portion of a large container used}
Sandpaper, brushes, etc: $3 {brushes are reused, sandpaper is cheap, but let's add something for supplies}
Bonding agent: $7 {ensures the paint sticks and doesn't require the sanding prep work}
Painting with Milk Paint is actually a time SAVER, because it dries so quickly. We chose a light color, so that meant it required a couple of coats. We'll call it three. Each coat takes about 20 minutes, so we're looking at an hour.
Painting Time: $20
Distressing/Waxing Time: $3 {about 10 minutes}
It's done! That's it, right? Well, there is also the rent {and utilities} that we have to pay in order to have a place to showcase the table.
Sq Ft Rent for Table: $25 per month, but we'll assume it sells in one month. It's also possible that it sells in the first day of the sale, and we replace it with something else that sells - this is ideal :)
And there are the folks we have to pay to work at the store while we're open. That only adds a small cost to each item, so we won't even add it here - but it's important to note the number of things that go into "selling" furniture!
So, what does that total look like?
Purchase price: $40
Gas: $7
Time: $40
A round pedestal table - priced at $40. The price was fair, so we didn't low-ball or negotiate. We drove 20 miles to pick it up. Because the woman selling it wasn't able to help Chad move it, both he and I had to go, costing us both time - it took about an hour there and back.
 |
| I forgot to take a Before photo, so I borrowed this from an online post. It is pretty darn close to the table we bought. although the veneer on this one is in better shape; price is also higher}. |
Gas: $7 {yes, our Jeep stinks for gas mileage, but it's great for hauling our trailer}
Time: $40 {we value our time at $20 per hour}
Then, when we got there, we found the reason the table was only $40 {which, of course hadn't been shared when we asked the condition} - the veneer was bubbling on both the top and the leaf for the table. Add an extra 30 minutes of veneer-fixing time.
Fixing: $10
Once it was prepped {fixing the veneer}, we were ready to paint. We use Milk Paint or homemade chalk paint, both of which require no sanding prior. Woohoo! Time savers! But, what we make up for in time, we lose in cost of paint. It's worth it, trust us.
Milk Paint: $18
Wax: $3 {a small portion of a large container used}
Sandpaper, brushes, etc: $3 {brushes are reused, sandpaper is cheap, but let's add something for supplies}
Bonding agent: $7 {ensures the paint sticks and doesn't require the sanding prep work}
Painting with Milk Paint is actually a time SAVER, because it dries so quickly. We chose a light color, so that meant it required a couple of coats. We'll call it three. Each coat takes about 20 minutes, so we're looking at an hour.
Painting Time: $20
Distressing/Waxing Time: $3 {about 10 minutes}
It's done! That's it, right? Well, there is also the rent {and utilities} that we have to pay in order to have a place to showcase the table.
Sq Ft Rent for Table: $25 per month, but we'll assume it sells in one month. It's also possible that it sells in the first day of the sale, and we replace it with something else that sells - this is ideal :)
And there are the folks we have to pay to work at the store while we're open. That only adds a small cost to each item, so we won't even add it here - but it's important to note the number of things that go into "selling" furniture!
So, what does that total look like?
Purchase price: $40
Gas: $7
Time: $40
Fixing: $10
Milk Paint: $18
Wax: $3
Sandpaper, brushes, etc: $3
Bonding agent: $7
Painting Time: $20
Distressing/Waxing Time: $3
Sq Ft Rent for Table: $25
This table COST us $176 to buy, paint, and put in the store. We'd likely price this table at $249 {which is determined by a lot of factors like our market, the piece itself, current demand for this type of item, etc.}

So once we've paid ourselves, the bills, and sold the table, we will have $73 left over to go buy another piece of furniture and start the process all over again.
And just for kicks, let's compare our table {$249} to a couple of major retail store tables & prices:
Wax: $3
Sandpaper, brushes, etc: $3
Bonding agent: $7
Painting Time: $20
Distressing/Waxing Time: $3
Sq Ft Rent for Table: $25
This table COST us $176 to buy, paint, and put in the store. We'd likely price this table at $249 {which is determined by a lot of factors like our market, the piece itself, current demand for this type of item, etc.}
 |
| Can you see all the distressed and chippy goodness in this photo? And the finish feels like butter. |
 |
| Well, it's apparent that we aren't professional photographers, but here is the finished table, with leaf. It's she a beauty?? |
So once we've paid ourselves, the bills, and sold the table, we will have $73 left over to go buy another piece of furniture and start the process all over again.
And just for kicks, let's compare our table {$249} to a couple of major retail store tables & prices:
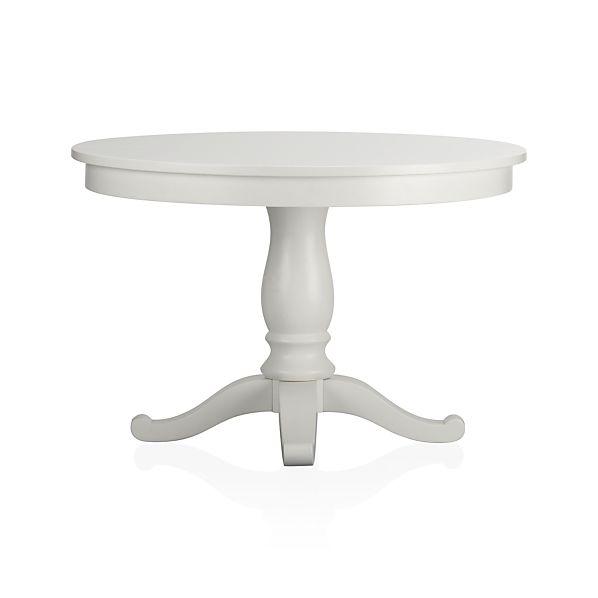 |
| Crate & Barrel, $499 |
 |
| Pottery Barn, $799 |
Now, let's be clear. I am not complaining. We LOVE what we do, we LOVE our customers, and we RARELY encounter a situation where someone is disrespectful about pricing. I didn't blog about this in an effort to change anything that happens in our store, nor to make you feel sorry for us - it truly is more about education. In fact, we even offer painting workshops through Carver Junk, so YOU can do these projects yourself if you like! And now, you'll have an idea of what it will cost you in time and real dollars.
{and, you won't be fooled by shows like Flea Market Flip! watch, enjoy, and take it as a great entertainment show :) }